
Floor-based drainage systems play a vital role in a wide range of different facilities, from breweries to food processing plants to industrial manufacturers. While some floors and drains are installed around the same time, you may often have them going down separately.
Older facilities will also need to upgrade their drainage, and a retrofit option is generally the best choice, rather than completely redoing a production floor that doesn't need redoing..
Installing a Channel Drain in Existing Concrete
In many cases, facility builders and managers have to work around pre-existing concrete flooring to install their trench drain or slot drain systems. Despite how it may seem, it's actually relatively easy to retrofit a drainage system, especially with the right system.
Here are some considerations to make when installing a channel drain in existing concrete, without any issues.
Choose the Right System
One of the most important steps in retrofitting a drainage system into an existing concrete floor is to choose the right system. While trench drains are a common choice, there are several options to choose from that may suit your facility even better. It's important to consider your usage, whether or not you have any food safety concerns, the amount of solid materials that hit your floors, and much more.
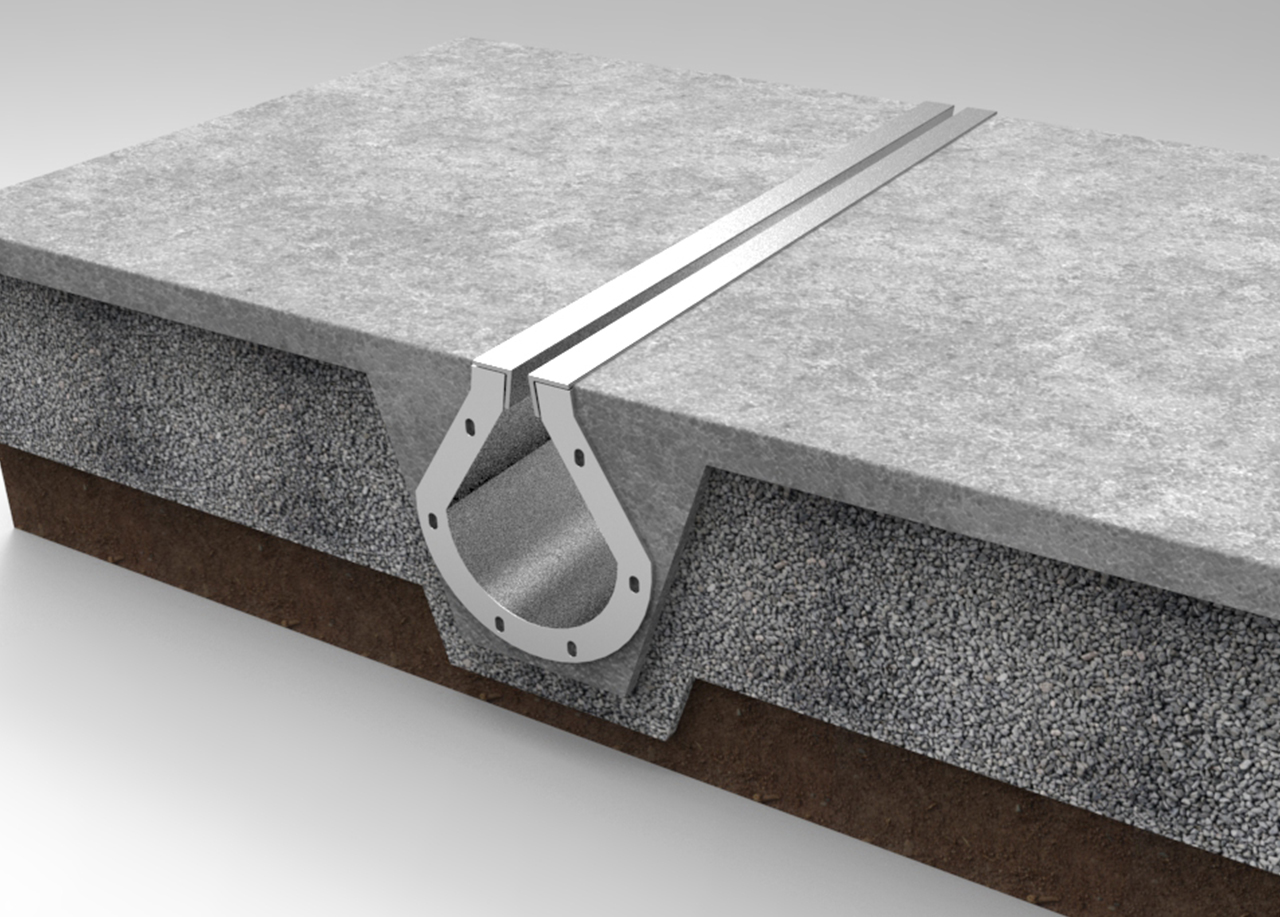
A modern take on the traditional trench drain is the the slot drain system, which is a pre-sloped, pre-assembled linear drain with a wide drain channel that curves around to a slim "slot" opening. Thanks to its shape and slope consideration, retrofitting a slot drain system into an existing concrete flooring is incredibly easy. If you're not draining a lot of solid materials, this system's discreet footprint is ideal for worker safety, not to mention aesthetics.
While a slot drain system may not be the right drain in some cases, there are several models to choose from, so there's likely one that fits your needs and your facility.
Know Where the Drain is Going
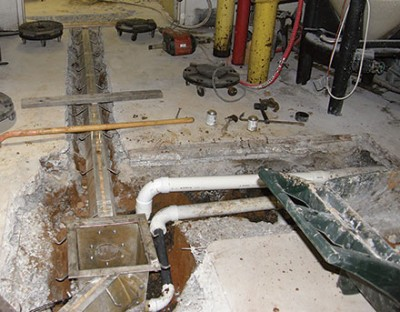
Once you have determined the drain system you need, it is critical to consider the placement and layout. Mark an outline for the drain on the existing concrete slab, which will help minimize mistakes in the cutting process, while giving you a visual representation of how your drains could affect your production process . You want to choose a location that makes sense with your facility set-up so that drains will be placed in the most efficient positions possible.
When figuring out placement and measurements for drains, take care to be precise with width. This will help ensure that your drain system fits exactly as it should so that it can function at its best. For example, a slot drain system requires a 24-inch width in order to fit perfectly.
Ensuring the proper depth will allow the drain system to sit flush with the surrounding concrete, creating a seamless transition that will prevent moving objects from catching in the drain channel and people from tripping and falling.
SETTING the Drain System
Depending on the drainage system you have chosen, assembly may be required. In the case of a slot drain system, however, a large portion of the work is already done for you, as channel sections are pre-assembled before shipping to your job site.
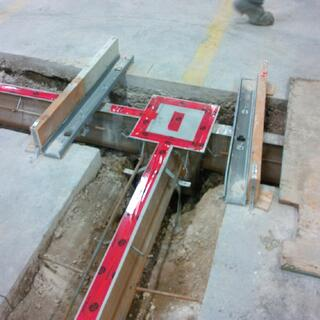
To provide more stability, it is recommended that you have a concrete slab for the drain to rest on. Additionally, it is critical to reinforce the sidewalls to prevent any bowing, which can warp the sides of the drain and prevent it from functioning properly.
Ensure that the drain channel is fully encased in concrete, with no air bubbles underneath, as this result in future damage from constant traffic over top of the drain.
LevelING THE DRAIN
Once the drain is in place and secured, the next critical step is to ensure it is properly leveled. This will help to ensure that the drain is flush with the flooring and does not stick out in any way. In the case of a pre-sloped drain, this will also help water move through the channel.
Proper leveling is vital to both the function of your drainage system and worker safety. It'll also support longevity, since pallet jacks, forklifts, and other traffic won't be constantly catching on the edges.
The Final Layer of Concrete
Once the drainage system has been properly positioned and is at the desired level to make it even with the floor, it is critical to secure the drain entirely by pouring another layer of concrete along the sides, which will anchor the drain channel and the rebar holding the drain in place.
Be careful when pouring this last layer of concrete and protect the drain opening with tape or some other type of product to prevent any concrete mixture from entering the channel.This can cause significant damage and potentially ruin the entire installation.
Finishing Touches for Retrofitting

After the concrete has had time to dry and cure, the installation can be finished. This includes removing any protective wrapping from the drains that was in place to prevent damage to the drain.
You can also take this time to test the drain to ensure everything is properly connected and working accordingly. Once it has been determined that everything is in working order, you can continue on with setting up your facility. This includes adding any protective floor coatings, like epoxies, and moving in facility equipment.
The most critical element to this entire process is taking your time to ensure that everything is done properly.
QUESTIONS?
If you have any questions about the installation process or would like to learn more about how slot drain systems can benefit your facility, contact one of our drainage experts today.
FoodSafe Drains contains numerous articles for food and beverage facilities researching the best types of drain systems for their applications.
